Wednesday, February 10, 2010

Conch Shell - FINISHED!

oil on panel, 9 x 12 inches
See previous post about this painting


(detail)

Over the last month blogging has taken a backseat to finishing the final paintings for my upcoming show at M Gallery in Florida, also setting up my new studio, starting private classes and workshops at the new studio, and teaching MFA candidates one day a week at the Academy of Fine Art.

Phew!

Oh, and I also started an amazing, inspiring ecorche class (sculpting all the bones and muscles of the human body in clay) with Andrew Ameral, master anatomy teacher from the Florence Academy.

So yes, I have been very busy, but really never happier!!

Pewter Pitcher

oil on panel, 8 x 8 inches

My favorite little pitcher, it was such a joy to do a study devoted to it alone! So many lovely oranges and lavenders peeking through its patina....

This painting and 5 others will be at my show at M Gallery in Sarasota, Florida for the month of March, opening March 5.

Be sure to check out the workshop I am offering in Sarasota to coincide with the show, and my other upcoming classes and workshops!


Tuesday, January 12, 2010

First drawing class in the new studio

I just held my first class in my new studio, a weekend figure drawing workshop. The class was a wonderful group, and we all had so much fun!

There is still space for ONE more student in my 5-week figure drawing class beginning this Sunday, an opportunity to study a long pose in my new north-light studio.

Also, I just posted registration information for my upcoming classes: "Still Life Painting" and "Drawing for Absolute Beginners".

More information at:
www.sadievaleri.com/teaching.html

Wednesday, December 23, 2009

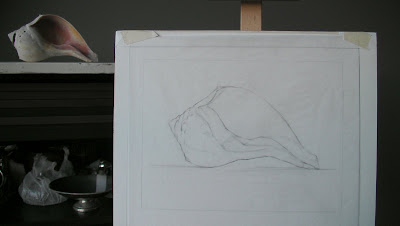
Conch Shell

I grew up visiting Cape Cod in Massachusetts, wandering the beaches with my back tanned dark from all my hours hunting seashells. So I was delighted when I saw this familiar shape sitting on the windowsill at the home of my friend Lisa. She told me a friend of hers found it intact on a Cape Cod beach, which I happen to know is a real find because they are usually broken. Lisa agreed to let me borrow it, and now that the new studio is set up I am finally able to begin studying the shell.

Drawing a seashell is like solving a puzzle - every piece fits logically with every other piece, there can be only one way it all fits together, and it is completely wrong until it is completely right. The same way some people enjoy doing crossword puzzles, I'm going to enjoy my next few hours at the easel finding how all those pieces fit together.

Tuesday, December 22, 2009

Studio Photos


The new studio is finally all set up! Thanks to everyone who made it to my studio warming party, if you missed it and you'd like a tour, just email me to arrange a visit.

I have been designing this studio in my mind for years, it's wonderful to get the chance to create the ideal environment for my work and for teaching students.

If you are interested in studying painting or drawing with me, please visit my Teaching Page to see the schedule for classes beginning in January. Also, sign up for my mailing list to be notified when new classes are posted.

Wednesday, December 09, 2009

Sterling Boat: FINAL

Sterling Boat
oil on panel, 9 x 12 inches

Finally finished! It ended up taking about 16 sessions over the course of a month, for a total of 68 hours, including the initial contour drawing. Thanks to everyone who has followed along the last few weeks as I posted all the stages of this painting, it been an interesting experiment to document the process so closely.

Here's a slideshow of all the stages of this painting:


Click slideshow to see it larger in Picasa

This painting will be in my March show at M Gallery in Sarasota, Florida. The show will coincide with my painting workshop, March 22-26, also hosted by M Gallery.

I've just added Still Life Painting classes to my San Francisco teaching schedule. I'm thinking about offering a drawing course for absolute beginners later in 2010, if this is something you'd be interested in please email me.

Finally, my new studio is coming together and I'm looking forward to posting photos soon, stay tuned!

Sign up for my mailing list to be notified when I post photos of the new studio, new artwork, and upcoming art classes.

Thursday, December 03, 2009

Perez Fine Art Gallery Online Exhibition

My painting Wrapped Silver Goblet is now showing in an online exhibit at Perez Gallery for the month of December. It's beautuful collection of work and I'm proud to be shown in this group!

Click here to see the Perez Gallery Winter Exhibit

You can even vote for your favorite painting ;)

Wednesday, December 02, 2009

Sterling Boat: Session 12

Sterling Boat - DETAIL - work in progress
oil on panel

Sterling Boat - PREVIOUS DETAIL

Tiny, tiny differences between the two, I just made this section more crisp, maybe you can tell if you compare the two shots closely. I won't even say how many hours I spent today on this one segment of wax paper, except to say it was my longest single session on this painting so far.

Wax paper in the light - the whitest, brightest parts, is always the hardest this for me to paint. I think it's because white oil paint has a different texture than the transparent paints in the shadows. White pigment is thicker and more grainy, so it looks like crusty paint even when other parts melt into a convincing illusion. And I'm always wishing it could be brighter to match the dazzling highlights I see. I always despair over these bright white sections in all my wax paper paintings.

In contrast, the strip of painted wood shelf is super easy, it flows out in a flash - I can spend hours to create the illusion of a square inch of wax paper, and only minutes for a square inch of painted wood.

What I like best about this section is the filtered cool light that shines through the paper and onto the edge of the shelf, illuminating it with a little pale glow within the cast shadow.

I listened to an audio book while I worked today, I usually listen to NPR podcasts - Fresh Air etc. But something about listening to one long narrative all day really enhanced my focus and I barely stopped painting for even a minute all day. It was great! I think I'll keep doing that. Maybe the podcasts changing subject so often is messing with my concentration.

Sometimes I listen to music while I paint, but usually the verbal narrative in my own head starts to get distracting. I have a bad habit of ruminating on unpleasant thoughts while I paint, so I need something innocuous to occupy my verbal brain while I work.

Are all artists like this? Can you work with focus for hours in silence, or with music? Can the music have lyrics or do you need it to be instrumental?

Making art while surrounded by chatter reminds me of art class as a young kid. Art class in elementary school was the one class where the teachers usually let kids talk while working, and I would always work silently but enjoy the chatter of schoolkid gossip all around me.

Tuesday, December 01, 2009

New Studio Preview

My husband Nowell took this photo of me in front of my new studio building this evening. And here's a sneak preview of the inside by day...

It's pretty bare now but at least you can see the cool double doors and beautiful north light! I'm dying to show you more but I'm going to wait till it's all set up.

Sterling Boat: Session 11

Sterling Boat - DETAIL - work in progress
oil on panel


Sterling Boat - PREVIOUS DETAIL

I spent most the 4-hour session today on the seashell, but I think you can see the most difference in the before/after shots if you look at the edge of the painted wooden shelf.

The seashell is challenging because it is reflective, translucent, AND colorful. I'm trying to show a shiny surface that also has depth, because the light both bounces off and penetrates the surface. So there's a lot of fiddling, pushing the values and hues around bit by bit. Slow, slow painting.

This is where glazing makes a big difference because I can layer transparent films of color into a couch of slow-drying oil medium, and make tiny adjustments.

Also, thinning the paint with oil makes a cleaner edge, because the texture and goopiness of the paint is reduced. Just like how melted butter can spread in a thinner layer than cold butter simply spread thin.


------UPCOMING CLASSES AND WORKSHOPS-----------
I teach Classical Realism drawing and painting classes and workshops in my north light San Francisco studio. I also offer workshops at other locations in the US. Please visit my Teaching page for more information and to register!

Monday, November 30, 2009

Sterling Boat: Session 10

Sterling Boat - DETAIL - work in progress
oil on panel

Sterling Boat - PREVIOUS DETAIL

The painting is coming down to the final stages, I'm hoping to be done in just a few more sessions. This is the stage of the painting when it gets hard to record the difference with a camera. I'm sorry to say the differences between the two above shots represents a solid 6 hours of work! The refinement is subtle but significant in real life, but almost impossible to see by the time the camera has degraded the images.

I was listening to one of my favorite podcasts today called "On the Media", and they were talking about the evolution of the book (OTM Episode: Book 2.0) now that we are crossing over into a digital era for reading. They interviewed writers and book publishers and future-thinkers who all had opinions, ranging from "it's not a book unless it has paper and glue and survives being dipped in the bathtub" to "the age of paper is dead and everyone will be reading in an entirely different way in 5 years."

One of the future-embracers was positing that the way writers WRITE will change in the new era, and floated his vision of a writer writing a novel live, online, with a real-time audience who will be intimately involved in the writing process, and that the whole process of creating a book with be collaborative and public. To which I though AAACK!!!

The interviewer suggested that many writers feel that solitude while working is integral to the process, and that some writers would not WANT to write if it had to be a public, collaborative process. The book-futurist (sorry I don't have his name, I don't take notes on my audio sources, unlike my husband who wisely documents everything he hears) said something to the point of "well, writers will just have to change they way they think about writing".

Writers will just have to change they way they think about writing. Wha????

As a an artist, I am probably on the leading edge of those who feel comfortable being public with my process - between my blog posts, my videos, and my teaching I try to make my process as transparent as possible, mostly for my own benefit of processing what I am learning, but also because some of you out there seem to enjoy seeing the thoughts behind the work. And yet, if I were forced to both share my process and allowed my visitors to comment on my decisions in real-time as I made them, and also modify my painting as the comments poured in, I would probably put down the brush and find something else to do!

I might be the extreme though, in that I shy away from collaboration, but some artists are more open to it. Personally, I need to be handled very carefully when I am in "work mode", as anyone who worked with me as a graphic designer can attest, I am not at all a "team player" when I am trying to be creative!

What do other artists think? Could you work with an audience? Even performing artists - could the musician practice with an interactive audience, could the actor rehearse with an interactive audience? Does it sound like a nightmare to you, or does it sound like a revolutionary frontier for artmaking?


------UPCOMING CLASSES AND WORKSHOPS-----------
I teach Classical Realism drawing and painting classes and workshops in my north light San Francisco studio. I also offer workshops at other locations in the US. Please visit my Teaching page for more information and to register!

Sunday, November 29, 2009

Sterling Boat: Session 9


Sterling Boat - DETAIL - work in progress
oil on panel

Today was another 4-hour session and I worked mainly on the spout, handle, and top edge of the pitcher. I managed to take a better photo and so I replaced the photo in yesterday's post too so the color is easier to see. (I didn't send out notifications about yesterday's post because the photo was so bad, so if you are just seeing it today that's why).

In yesterday's post I mentioned "value bracketing" and got a lot of questions about that.

What I mean by value bracketing is taking the time in the first stages of a drawing or painting to block in the value range of each particular area, and then as the drawing progresses, to stay within that initial value range without fail. Some artists assign numbers to values and codes to color, to identify a range and remember to paint or draw within a particular bracket.

For an example of two different areas I mentally bracketed in my current painting, you can see these two areas of wax paper in my current painting are in completely different value ranges:


Top left corner - DARK value range

Low middle area - LIGHT value range

As the painting develops there will be days when I am working on one of these small areas for a whole session, without ever comparing it to another area, so it is tempting to exaggerate the value range in a given area. If I am not disciplined to stay within the value range I've already determined is appropriate, I will make the lights too light in the dark areas, and the shadows too dark in the dark areas.

In the light area of my wax paper in the cropped detail above, the shadows in the creases of the wax paper are bare whispers. In real life it looks like there are huge differences between the shadows in the creases and the bright highlights of white light reflecting off neighboring areas. If I attempt to "copy" that value jump I see, I will make the shadows far too dark and I will destroy the illusion of light in the whole piece.

Our eyes can perceive a much wider range of color and value than paint can ever depict. For example, pure white paint directly from the tube is nowhere near as bright at the lightest highlights on my subject. That's why even the most hyper-realistic painting is still just an illusion, a mere hint of what our eyes can experience in real life.

To capture the sensation of seeing a subject, the artist must preserve the feeling of the whole - how every part relates to every other part. This is so easy to destroy as we zoom in and work closely, because we lose context and we forget that the individual parts, no matter how detailed or realistic, are merely supporting roles to the whole effect.

So I try to depict each edge of each shape with only the smallest value and hue shift I can manage. If I copy the big "jump" I see between two neighboring patches, I will destroy the unity of the painting.

------UPCOMING CLASSES AND WORKSHOPS-----------
I teach Classical Realism drawing and painting classes and workshops in my north light San Francisco studio. I also offer workshops at other locations in the US. Please visit my Teaching page for more information and to register!

Saturday, November 28, 2009

Sterling Boat: Session 8

Sterling Boat - DETAIL

Sterling Boat - DETAIL - previous stage
See previous post about this painting here

Today I worked on the wax paper - another 4-hour session. It shows how the wax paper slowly starts to look like transparent crumpled material, instead of only gradations of paint.

Painting is 99% drawing by the way. I never believed it more than I believe it now. If you want to be a better painter, study more drawing. I am amazed by how the same principles I teach the most beginning drawing student are the principles I must hold as my mantra all day every day: Look for the large shapes, bracket the values, work large to small and from shadow up to light...

It even applies to color, because you can't build a believable range of hue without understanding value bracketing.

Drawing is learning when it is appropriate to focus your decision-making on a particular scale: solve large problems first and smaller problems later. Use the problems that appear at a small scale to find solutions to the larger-scale problems.

Learning to draw is the discipline of ONLY tackling the problems you can solve at THIS stage of the artwork, without getting distracted or confused.

I've come to believe that drawing (and artmaking in general) is about organizing your thought process, and nothing else at all.

Wednesday, November 25, 2009

Sterling Boat: Session 7

Sterling Boat - DETAIL - work in progress
9 x 12, oil on panel

I finally got in a nice long 6-hour painting session today, and it was so exciting to finally be working in color.

It took me a while to get used to painting in color over the more fully realized grisaille (monochrome) underpainting, and after the first hour of working in color today I wiped my work away and had to begin again. But then I started getting a feel for how opaque/transparent to work and everything started to flow.

The photos actually reduces the color a bit (and darkens everything). I repainted the pedistal base of the silver pitcher in color, but in the photo it still looks monochromatic.

Once I get everything to this level of detail, Ill make a final pass with the super tiny brushes, which gives a painting the extra snap of realism. I'll probably spend another 8 sessions or so on this painting.

Now I'm off to cook the dishes I'm bringing to my mom's Thanksgiving spread tomorrow: ratatouille side dish, traditional stuffing, and cranberry sauce...

Happy Thanksgiving!

Tuesday, November 24, 2009

New Studio, New Classes and Workshops

As many of you know, I currently work in a very tiny studio, which I affectionately call my "art pod". While it's an ideal workspace for still life, it's a bit tight for students or models, so I have known that eventually I would need to upgrade.

Well, I am excited to finally announce that after months of searching, I have found my new space: a gorgeous 500 square foot studio with north light in the heart of the Mission neighborhood of San Francisco.

It's in a wonderful old warehouse with hardwood floors, enormous windows, and one of those fabulous old-fashioned radiators. I am currently setting it up for ideal classical study, with a dark neutral wall color and thick draperies to control the light.

Beginning in January I will be offering Classical Realism drawing and painting classes and workshops in the new studio. Please visit my updated Teaching page for more information and to register!

Sunday, November 22, 2009

Surface Preparation

I spend the first 15-30 minutes per painting session preparing the surface of my painting-in-progress.

Like so many other aspects of this lifelong process of learning to paint, previously I could not imagine focusing on something so mundane and technical, but I find it saves me so much time and headache later that it's worth the investment. And now I actually enjoy the sort of easy, meditative process of cleaning and preparing my surface.

First, I only paint on a dry surface that has had at least 20 hours to set for underpainting medium, and 40 hours to set for slower-drying painting medium. Painting on a gummy or tacky surface just makes a mess. (The recipes I use for painting medium and underpainting medium are in my Materials post)

Next, I use a tiny folded piece of 12oo grit sandpaper to lightly rub the surface of the completely dry layer from the previous painting session. This loosens any lint or grit that dried into the previous layer, which can then be lifted off by lightly dabbing with a small piece of masking tape.

The abrasion also gives the dry layer more "tooth" so the wet paint sticks - otherwise the oil tends to bead up.

(Abrading makes the surface a bit cloudy, and the previous rich oily areas look chalky and ugly. It's ok though, the luster comes back easily.)

Once I have a lint-free, abraded surface I use a soft filbert brush to apply a thin layer of painting medium - but only to the area I plan to work on in this session. Even a thin layer can sometimes drip or run, so I use a clean, microfiber cloth to wipe away most the oil.

This oiled surface is called a "couch" - I'm not sure why except that painting on it feels like sinking into a comfortable couch, the paint flows off the brush so easily.

To start painting, I pre-mix my puddles of values and colors on my palette with my palette knife, and then re-wash my clean brushes in Natural Turpenoid, to get rid of any dust that may have settled overnight, and also to re-wet the bristles. Then I dry the brush on a clean cloth and dip it into my painting medium.

After all that, I'm ready to start painting!

Sterling Boat: Underpainting stage 6

Sterling Boat - work in progress
9 x 12, oil on panel

Today I worked on the wax paper, and although I refined every bit of it, from this photo you can barely see a difference from the last stage. But this level of refinement will really help when I move to the color stage. This session was a little over 4 hours.

Saturday, November 21, 2009

Sterling Boat: Underpainting stage 5

Sterling Boat - work in progress - DETAIL

Sterling Boat - work in progress - PREVIOUS DETAIL

Sterling Boat - work in progress - DETAIL

Sterling Boat - work in progress - PREVIOUS DETAIL

I worked today on the reflection of the seashell, and also the handle and the spout of the gravy boat.

I ended up redrawing the shape of the handle significantly. I sort of knew the drawing wasn't right when I was working in pencil, but I had wrestled with it a long time and I finally gave up. But when I started refining the paint today, it I realized I couldn't live with the errors and and ended up rethinking all the contours -- which is far more frustrating to do in paint than in pencil. But I'm glad I took the time to do it because the handle now feels more structured and believable.

The spout was much easier, because I worked and worked to get it correct in the previous pencil drawing stage, so it only took about 30 minutes to refine the painting. Which is a good thing, because with the early winter nightfall these days I am always racing to finish the day's work in last few seconds of workable light every evening.

Studio Hours
In the comments of my previous post Rahina asked how long I spend per session. I realized that's a great idea to note, so I'll start mentioning that when I post. Today I spent 4 hours painting. I rarely paint less than 4 hours in a session and I generally aim for 6.

Once I am working I don't look at email or answer the phone and barely take a break at all. But it's almost like being under water, to ignore absolutely all distractions for several hours, and so part of me resists the initial plunge. Once I'm in the studio though, I always wonder what took me so long to get there.

When I am not in the studio I am preparing lessons for my students, looking at blogs of fellow artists, planning my dream studio, writing up course descriptions, shopping for art supplies, preparing submissions to galleries or contests, shipping artwork, and, of course, blogging. I am amazed how much work there is to do for this art life, and it turns out I am the strictest boss I've ever had. But I love it all, so it doesn't feel like work.

Coming soon.....
I have some exciting studio news I'll be announcing in the next few days, so stay tuned!

Friday, November 20, 2009

Sterling Boat: Underpainting stage 4

Sterling Boat - work in progress - DETAIL

Painting in grayscale at this level of detail feels more to me like drawing than painting... maybe that's why I enjoy it so much.

Wednesday, November 18, 2009

Sterling Boat: Underpainting stage 3

Sterling Boat - work in progress
9 x 12 inches, oil on panel

I've continued to develop my underpainting. I'm always anxious to jump ahead into the color stage from here, but I am disciplining myself to stay with values for a while longer. It just makes the rest of the painting so much easier if I develop the underpainting as much as possible before moving ahead.

I'm thinking about adjusting my underpainting medium - it dries too fast, and now that I am working on my underpainting longer, I'm realizing I begin to race just to paint faster as the medium dries. It's got more thinner in it than the oily painting medium, and it pretty much sets up in a day. So after 6 hours of painting, my paint begins to get sticky - ugh.

Ecroche in Oakland, California:
There's an amazing ecroche class being offered in February 2010 by Andrew Ameral. The SF Bay Area is so lucky to have Andy, he's returned from teaching at Florence Academy for 7 years. Anyway, ecroche is building a model in clay of a flayed human figure, starting from the bones and layering up through the layers of muscle. I am so hoping to be able to take the class!


--------TEACHING-----------
I am planning my teaching schedule for 2010 so take a look at my teaching page and sign up for my mailing list to be notified when I post new classes and workshops.

Tuesday, November 17, 2009

Montreal from a Musical Perspective

My Brooklyn-based friend Kyra kindly accompanied me on my jaunt to Montreal to see Waterhouse last week, and on her blog she has written up our trip from a musical perspective.

I think you'll find it amusing to compare her writeup to mine - you'll read she bought black pointy-toed boots, whereas at the same store I bought round-toe eyelet-patterned pale pumps, which may sum up our complimentary contrasts (as well the different shoe requirements of our respective cities). But we agree on issues such as good wine at dinner, raw oysters at brunch, and speaking bad French to cab drivers - not to mention the need to consume croissants and coffee immediately upon waking - so we're fantastic travel partners.

Check out her fabulous music blog SWICK: Smartest Women I Know to read about our Montreal trip from an audiophile's perspective.

Sunday, November 15, 2009

How To Save a Drowning Drawing or Painting

Every artist knows the feeling: As we work on a piece we slowly become aware that our painting or drawing is not progressing, but instead it is moving further and further away from what we want it to look like. We work faster and faster, desperately fixing and adjusting, but the piece just gets worse and worse and we get more and more confused about what to do.

I call this "circling the drain" because we watch as our painting or drawing spirals right down into the sewer.

From observing my own process and also how my students sometimes get lost, I have found that this is the result of one single, simple problem, and there is one single, simple thing we can do to halt the downward spiral and salvage the work:

LOOK.

Easy enough, but it's amazing how often we all forget to look at our subject. Our tendency is to just stare at our own artwork and fiddle, which just makes the problem worse.

This is what I have posted in my studio to remind myself what to do when I get lost:

Look LARGE
Look OFTEN
Look LONG

This is what I mean by each of these:

Look LARGE
We naturally tend to zoom in our vision, narrow our focus, and look at tiny areas. Then we inch our way around the subject as if we are drawing by looking through a drinking straw. This makes mountains of molehills; literally, small variations on a contour are magnified when we zoom in. It also tends to make us exaggerate differences in value, so we make a dark patch too dark and a light patch too light.

The key is to back up and look at your artwork and your subject with large vision, comparing every part to every other part instead of focusing on small areas. Scan for the largest shapes, move your vision around often: if you are drawing a figure's head, move down and draw the feet for a while. Compare values deeps in the shadows to values far away in the light areas. Draw the whole, not the parts. Think big.

Look OFTEN
We all have a tendency to hunker behind our easels with our nose to our own artwork. After a while, we forget to ever peek around the easel at all and we end up drawing or painting essentially from our imagination. But if you discipline yourself to make a mark and LOOK before you make another mark you will suddenly find the painting or drawing flying along easily, growing magically from under your brush or pencil. Mark, look, mark, look, mark, look.....

Look LONG
When we are really, really lost, sheer panic sets in. That's when we have the urge to keep working faster and faster, and the artwork falls out of control at an alarming rate. When I get really, really lost I put down my brush and just stop and look at my subject. Then I bounce my vision between my subject and my artwork, back and forth, without ever making a mark. The longer I can discipline myself to look without making a mark at all, the clearer it becomes what needs to be adjusted. I tell my students to put down their charcoal and make a mental list of THREE things to change before they pick up their charcoal again.

A note on self deception:
Sometimes a piece of artwork is falling out of control but we can't admit it. We are too attached to the work we have already put in, and we want the artwork to be better than it is. This is where integrity comes in: the artist must hold themselves to the highest standard, otherwise no learning or exploration is happening. If we tell ourselves our art is "good enough" it isn't. That is self-deception.

To be art, it must be better than "good enough".

Do what it takes to learn and get better with every mark of every piece. Otherwise, we may as well go find a less demanding endeavor. Why be an artist, if not to get better?

--------TEACHING-----------
I am planning my teaching schedule for 2010 so take a look at my teaching page and sign up for my mailing list to be notified when I post new classes and workshops.

Sterling Boat: Underpainting stage 2

Sterling Boat - work in progress
9 x 12 inches, oil on panel

Today I worked on the grisaille stage of the underpainting, which is a value-only underpainting. The previous stage uses raw umber and ultramarine to make a neutral color grey, and uses the white of the panel for the lights. This is called an open grisaille, because the white of the panel shows through.

This second stage is a closed grisaille. I use the same raw umber and ultramarine blue for the neutral dark gray, but I also use flake white (cremnitz white) for the lights. When it is done the white of the canvas will not show at all, the surface will be covered by paint.

I used to only paint an open grisaille layer, and then go right to color. But I have found it saves me a lot of time (and anguish) in the later stages of color if I take the time to make a complete value painting in closed grisaille first. The open grisaille is just too transparent and textured to behave well as an underpainting for my needs.

I also spent some time wet sanding this layer with my underpainting medium before I began painting. This removes dust that may have embedded in the previous layer as it dried, and makes it easier to paint on the dry surface. Putting down a layer of medium to paint into is called a "couch".

--------TEACHING-----------
I am planning my teaching schedule for 2010 so take a look at my teaching page and sign up for my mailing list to be notified when I post new classes and workshops.

Friday, November 13, 2009

Sterling Boat: Underpainting Stage 1

Sterling Boat - work in progress
9 x 12 inches, oil on panel

I worked up the preparatory drawing for this painting a few days before I left for my trip to New York, and varnished it before I left, so when I came back to the studio today it was all dry and ready to start the under painting. Might be hard to see yet what it is - it's an antique silver gravy boat and a seashell perched beneath a 'wave' of wax paper.

I'm not videotaping this painting like I have previously, but I took photos while painting today. The first layer of under painting is just quickly roughing in all the values, I spent about 3 and a half hours today. Today is probably the only day I'll cover the entire surface in one painting session.

stage 1
The initial contour drawing took about 8 hours over 2 days. I started the basic block-in drawing on trace paper but completed the final refined linework directly on the gessoed panel. Then I varnished it with a mixture of damar, turp, and a tint of titanium white to seal the drawing and the porous gesso surface. This makes a nice surface to paint on - not too thirsty, not too slick - and also prevents the graphite pencil from mixing with my first layers of paint.


stage 2
I start the underpainting in the darkest black areas and work in steps up to the lightest lights.

stage 3

stage 4

stage 5
The painting is still rough and brushy at this stage. The paint texture is hard to control at this point, and I'm just massing in values, so I try not to spend too much time worrying about unwanted textures.

--------TEACHING-----------
I am planning my teaching schedule for 2010 so take a look at my teaching page and sign up for my mailing list to be notified when I post new classes and workshops.

Waterhouse and Vermeer

I've just returned from a very fast trip to see the Waterhouse retrospective in Montreal and the Vermeer exhibit at the Met in New York - a whirlwind jaunt scheduled between Thursdays when I must be in San Francisco to teach my class.

Photos were not allowed in the exhibit but I've found a few repros of my favorites from the exhibition. The painting above just glowers at you, such a strange composition with the dark face surrounded by blinding light. In person the rough brushstrokes are surprising - the painter's drawing ability is so precise that he can throw down a swatch of golden drape with just a scumbled a stroke or two.

What impressed me most about seeing the Waterhouse paintings in person is the incredibly precise control of hue and value the painter employs to create his striking compositions. I realized every reproduction I've even seen is grossly inadequate in both color and value - including these here. Waterhouse paintings in person have enormous ability to control how you look at them, even inch of composition is worked out and every shift of hue and value is set to create a precise experience of the spaces he creates.

And yes, I got to see 'my' mermaid painting, the same one I loved and copied at age 12.


Back in New York I had just a few hours to run through the Met - saw some old favorites, tried not to get distracted, and made it to the Vermeer collection even though I mistakenly wore new shoes and had aching feet.

I did sneak a quick photo of Milkmaid and was swiftly reprimanded by a watchful guard. But it's only the second time the painting has been exhibited in the US and I couldn't resist a quick snap. A girl's head got in the way, but it gives you a sense of scale - the painting is tiny, and glows like a jewel. I never knew it before, but one of the tiny decorations on the baseboard behind the milkmaid is a cupid - indicating she is thinking of her love.

While in New York I also visited Janus Collaborative and Grand Central Academy, to see my teachers and friends and to get my annual fix of dreaming what it would be like to study full time in a classical-tradition atelier. Take a look at GCA's gorgeous cast studio -- the room is arranged so each and every sculpture cast in the room is mounted against a neutral background and lit with a single light source -

As a final stop I made a pilgrimage to Arcadia Gallery just before closing time on my last day, and got to drink in some Hicks brushstrokes and Liberace linework. I even got to see a recent Sprick still life where he plays with the perception of foreground and background. Looking at a Sprick painting is like watching a master chess player - one with a sense of humor.

Overall a very productive and art-full trip.

Monday, November 02, 2009

STUDIO Gallery - The 'Tiny' Show

I have a new painting showing in STUDIO Gallery's annual 'Tiny' show -

From the gallery's announcement -

Let's get small! tiny is the place to pick up a little something for your own collection--or an outstanding gift--all while supporting local artists. And with work on display from 135 artists, you're bound to find that perfect something. Everything is under 7" x 7" and, best of all, under $400, with loads of pieces under $200. We'll have hundreds of pieces on display in the gallery, with new work added every day. (And as an added bonus, we'll be hanging some larger pieces we just couldn't resist from some of the gallery's most popular artists.)

I forgot to take a photo before I dropped off the new piece, so you'll just have to visit the show to see it.

Also, my painting 'Silver Globe Pitcher' will be on display at the gallery as well.

tiny
small pieces under $400
Nov 4th - Dec 23rd
reception: Sunday, Nov 8th, 2 - 6 pm
6th Anniversary Party: Sunday, Dec 6th, 2 - 6 pm


STUDIO Gallery
1815 Polk Street (between Washington & Jackson)
San Francisco, CA 94109
415.931.3130


More about the show here -

Monday, October 26, 2009

Winged Victory Drawing Demo


See the larger version here

I made this 8 minute movie of my 10-hour drawing of my cast statue "Victoire de Samothrace" to demonstrate the optical block-in method.

1. The line drawing is all straight lines.
2. The shadow side is first filled in as all one even tone.

These two methods are difficult to adhere too, but if you can do it they address the main difficulties in drawing: capturing accurate proportion, and understanding light and shadow.

Materials:
  • Strathmore 400 drawing paper (not ideal for charcoal)
  • vine charcoal, hard medium, and some soft (sharpened very sharp with sandpaper)
  • kneaded eraser
  • white "magic rub" eraser
  • paper blending stump
  • rough, cheap paper towel for blending


Winged Victory
charcoal on paper
18 x 24 inches

Sunday, October 25, 2009

Workshops

I am thrilled to announce I'll be teaching two still life painting workshops in 2010!

March 22-26, 2010
M Gallery in Sarasota, Florida

June 28 - July 2, 2010
Bay Area Classical Artist Atelier in Belmont, California

Here is the course description for both:

The sensitive observation of even simple objects can yield dramatic paintings. Working in oil paint on gessoed panel, students will learn the refined glazing and layering techniques to render the most subtle effects of light. Beginning with a drawing on paper transferred to smooth panel, we will paint open grisaille, closed grisaille, opaque layering, and finally glazing to create highly refined images.

Using knowledge gained through her studies of the effects of light on transparent and reflective surfaces through her "Wax Paper" series of still lifes, Sadie Valeri will share her methods for creating powerful and sensitive paintings. More importantly, she teaches how to see and understand the structure, value, and color principles that underpin believable realism.

Click the links above to register for each workshop.

I'm also hoping to offer a drawing workshop next summer, please sign up for my mailing list in the right-hand column to be notified of my upcoming teaching schedule.

Monday, October 19, 2009

Open Studio Recap


My Open Studio was a lot of fun this weekend!

I met a lot of wonderful people and had fun talking art all day with fellow artists, art lovers, and neighbors. I even met a Florence Academy-trained classical realist who lives right around the corner.

Saw some old friends and new, past students, current teachers of various disciplines, and generally hung out and discussed everything from Classical Realism to the neighborhood lore about the crazy parties thrown in my courtyard in the 60's.

On top of that, I sold several pieces! So a big success all around.

Plus, my little studio is all clean and spiffy and I'm exited to get back to work on the next batch of paintings.....

Wednesday, October 14, 2009

Two Small Paintings

Beach Stone and Wax Paper
oil on panel
5 x 5 inches

Wrapped Bottle
oil on panel
5 x 7 inches

See preparatory drawings for these paintings here.

I finished these 2 small paintings today just in time for my open studio this weekend! It was fun to work small, I'm hoping to do a whole series of these.

My studio here in San Francisco will be open to the public this weekend:

October 17-18
11am-6pm
Carl Street at Cole Street
N-Juda MUNI line

Public transportation highly recommended as my street will be CLOSED to cars for a block party on Saturday.

Hope to see you there!