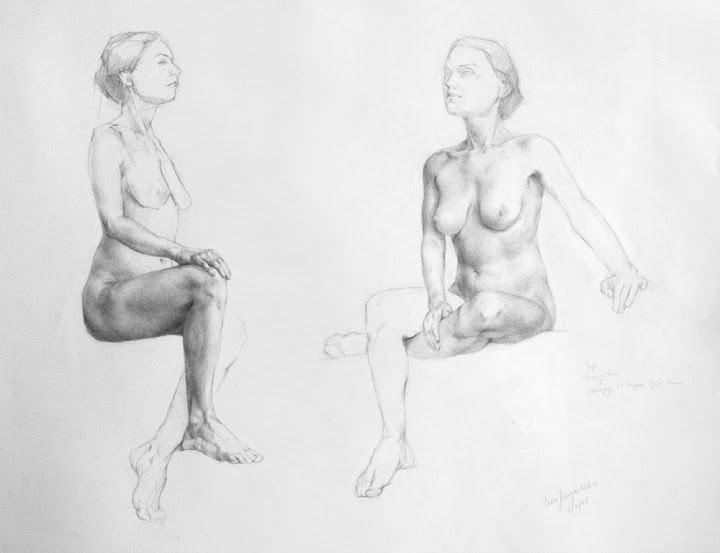
 Melissa by Sadie Valeri
graphite pencil on paper
about 20 x 16 inches
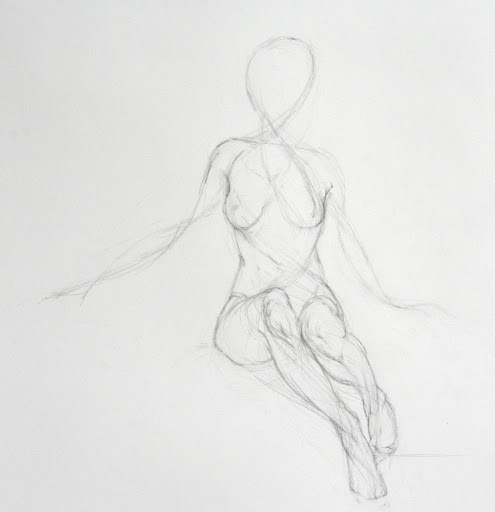
This is the main drawing I did over the last two weeks in Michael Grimaldi's drawing workshop at BACAA. It was drawn over about 8, three-hour sessions. (It's interesting to compare this drawing to my first BACCA workshop drawing I did of Melissa in March 2006)
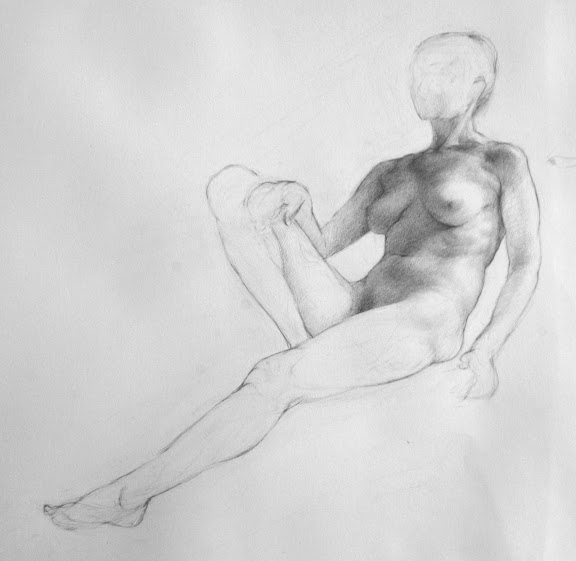
") detail (by Sadie Valeri)
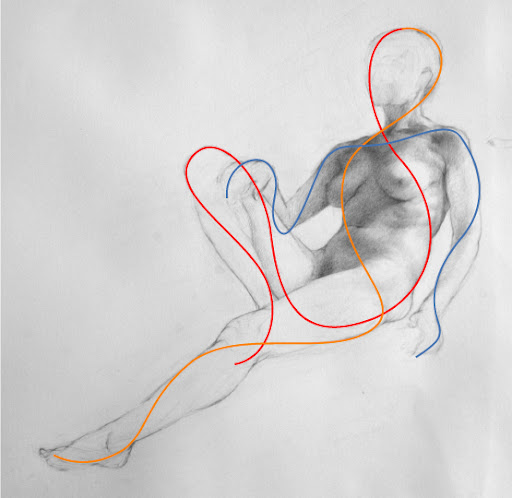
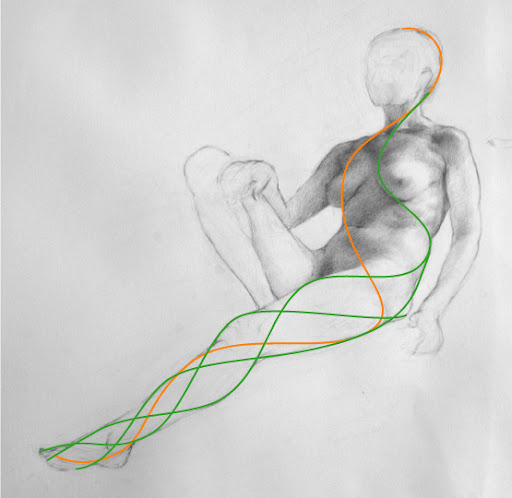
detail (by Sadie Valeri)We started the drawings with a 2-dimensional, stright-line block in that I have described many times on this blog, for example: here, here, and here.
After solving the basic proportions and refining the block-in, we moved into seeing the forms as three-dimensional blocks in perspective.
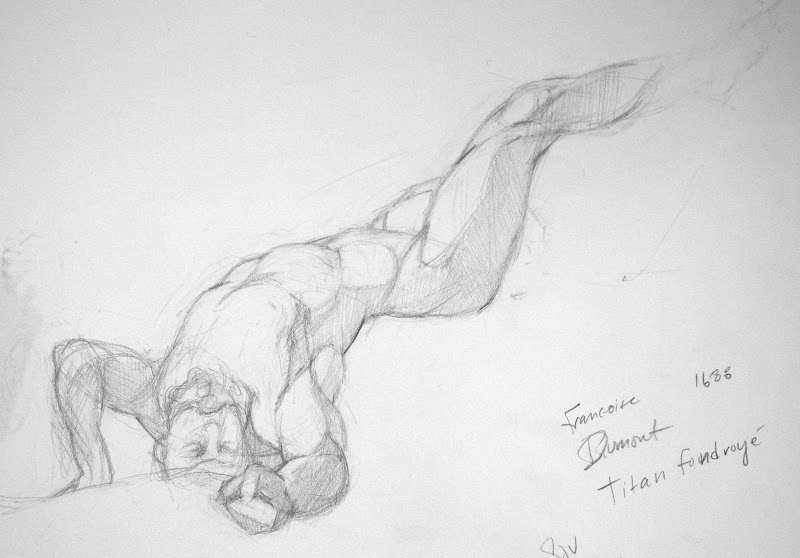
To construct the major masses of the head, torso and pelvis, we identified bony projections and median lines to describe the roll, pitch, and yaw position of each shape.
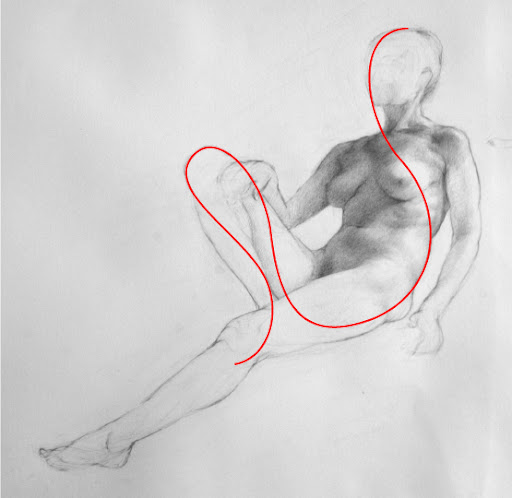
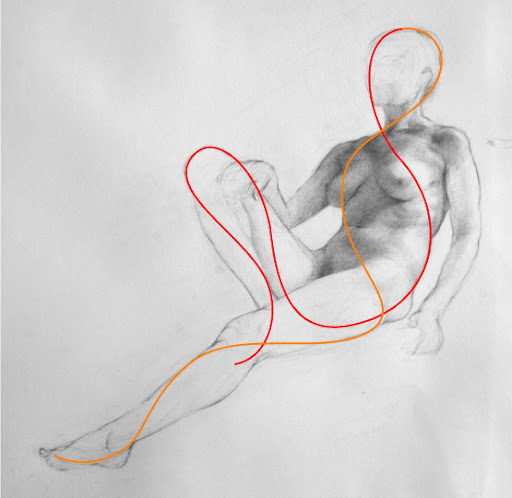
 detail (by Sadie Valeri)
I've roughly diagrammed a few of these with the red lines in the picture above. The points where lines intersect are determined by bony projections and places where the flesh attaches to the underlying bony structures. We look for indications of these on the surface of the skin, and build a concept of the box construction of each form: showing the perspective to identify tilt, position and distance.
Here are some of my notes from what Michael said in class:
Gesture, Proportion, Perspective
All three are inseparable, any error in one creates a series of problems in your drawing.
All the answers are within the drawing.
We need to find the points on the body that yield the most information about perspective possible. These are the distant outside bony projections.
This pattern of points starts having a profound meaning about the subject's three-dimensionality.
Let the drawing inform what your next decision will be.
Make a three dimensional drawing without relying on value - the plotting of points and median line tells you what the perspective is doing.
Look for the constructive anatomy and the perspective as a foundation for the drawing.
Anticipate without inventing: Hone the ability to see your environment through knowledge.
Drawing is like diffusing a bomb, all the concepts are a form of deconstructing and reverse-engineering.
There are two extremes, monotony versus mayhem. Our goal is to find a balance between the two.
Composition is the "composite", the entire experience of the image, from design to texture to paper to size, everything that affects the view's experience of the image.
Cut of the light - the angle of the shadow is perpendicular to the light
 The image above is a detail of the small value study I did in the upper right corner of my drawing, about 3 x 6 inches. Michael encouraged us to make small tonal studies before moving forward with making a full tonal drawing. This really helped solve a lot of the major tonal decisions - otherwise it's too easy to mix light and shadow and make inadvertent holes or protrusions.
 The lower part of my drawing shows how I blocked the terminators - delineating where the light slips over the horizon of the form. These terminators seem much softer in life, but there is a distinct moment where the shadow ends/terminates and the light begins.
To find the terminators, which can be confusing when seeing light slide over a complicated form, Michael encourages us to find "the cut of the light" - the angle of the line perpendicular to the direction of the light source. I've diagrammed some of that here:

I also wrote down the artists and films Michael referred to in his lectures this week, here's the list and links to the best resource I could find about each (in no particular order):
Artists/Paintings/Art Movements
Brunelleschi - created/discovered our current understanding of perspective
Harold Speed
Munich School
Ashcan School
Antonio Lopez Garcia - Dream of Light
Vicent Disiderio
Neue Gallery, NY
Reubens - Rape of the Sabines
George Bellows - Use of the Golden Section
Gericault - Raft of the Medusa
Balthus
Chardin
Walter Murch
Damien Hirst
Wim Delvoye
Tim Hawkinson
Neo Rausch
Marlborough Gallery
Betty Parsons
Films
Michael references films constantly so I asked him to name some of his all-time favorite ones. This is his list, in no particular order and off the top of his head while we were talking:
The Conversation
Memento
The Lives of Others
Miller's Crossing
The French Connection
Blade Runner
Collateral
The Third Man
Kurosawa Eloru and Stray Dog
If you are interested in studying with Michael, who is a fabulous teacher, please visit Bay Area Classical Artist Atelier. He also has started his own school along with Kate Lehman and Dan Thompson: Janus Collaborative School of Art in New York.
NOTE: As Usual, My Caveat
Everything I post on my blog is my own highly subjective and filtered interpretation of my studies. My notes don't necessarily accurately reflect the teachings of my instructors, in fact my teachers may disagree or find some of my expression of their ideas to be inaccurate. The best way to understand their teaching is to buy their books and take their classes.


