Monday, March 29, 2010

Still Life Painting Workshop Recap


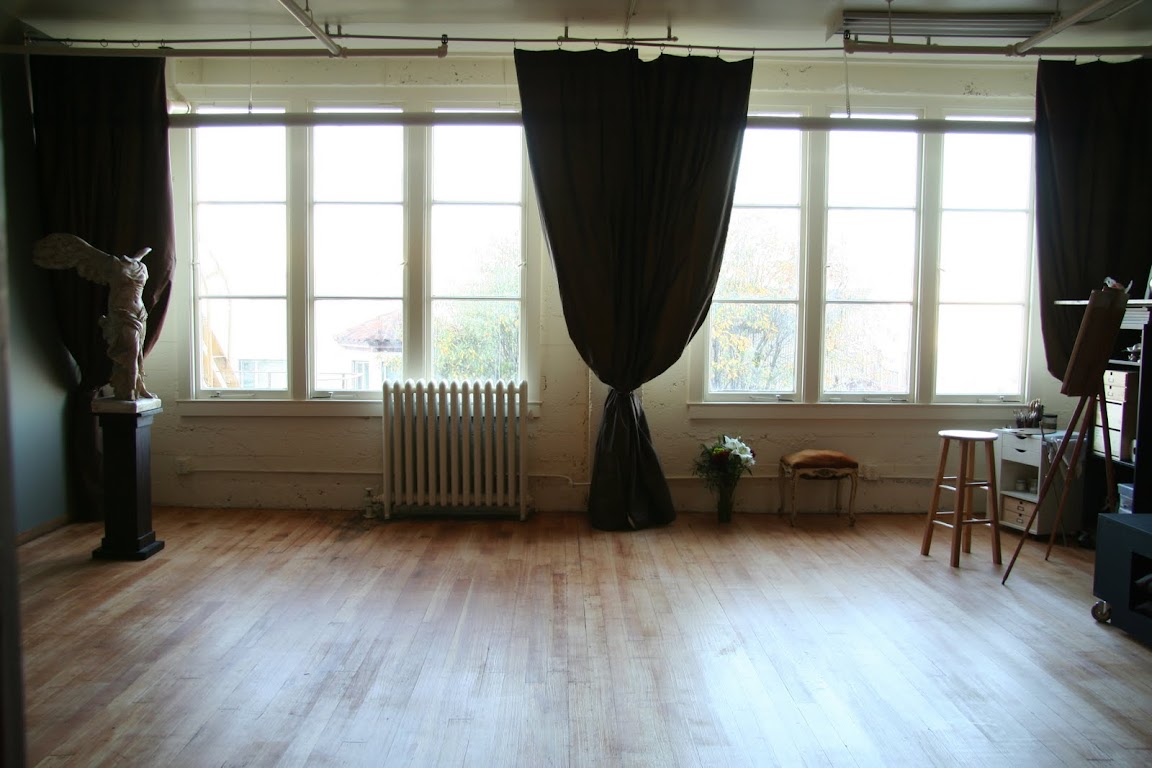
I had a wonderful time teaching my still life painting workshop, graciously organized and hosted by M Gallery in Florida. We painted at Susan Foster's incredibly idyllic and perfectly appointed studio.

After blogging about all of my workshops over the years, it was an amusing switch to teach the workshop myself, and have my students do the blogging! Two of my students, Loriann Signori and Deborah Elmquist, both accomplished painters themselves, wrote several beautiful posts describing the process and philosophy I teach. Check out their links and enjoy their paintings!

The challenge of running a workshop based on the way I work is to condense what is usually at least a 60-hour process, down to 15 hours of demo time for me and 15 hours of painting time for my students. Therefore, I had each artist paint a teeny tiny painting, 5 x 7 inches. Even given the Florida humidity, which unexpectedly slowed the drying time for each layer, every single artist did a formidable little painting!

I had a truly enjoyable time, and I feel incredibly lucky that "work" for me is hanging out in a beautiful studio with a highly skilled group of artist students, all eager to learn.

During the week I also had the supreme pleasure of meeting two artists I have long admired, David Kassan and Susan Lyon, both of whom were also invited to Sarasota, Florida for demos, teaching and exhibition.

Below is the demonstration panel I painted during the workshop, it's 6x8 inches:

Pencil drawing blocked-in on trace paper or mylar

Pencil drawing transferred to the panel and refined.

"Open grisaille" or sometimes called a "wipe-out": raw umber and turp

"Closed grisaille", or "dead layer" painted with grays mixed with:
flake white, raw umber, ultramarine blue.

Full color, work-in-process. Would need another week to finalize!


Friday, March 19, 2010

Ecorche - Skull Refined


As Andy says: "Really nerd out on all the little details"! It was fun to spend the day doing all the tiny refinements that make the structure of the bones feel both delicate and strong. I was thinking, just like with painting, it's so important to notice the difference in edges - sharp versus rounded, and everything in between.

Home-Cooked Gesso Part II


My materials for making home-made gesso


I previously wrote a post about making my own gesso. This new post shares my notes based on my most recent batch: This week I prepped over 30 very small panels for my students.

The instructions below are based on the recipe and steps outlined on the Sinopia website, but I added all the tips and tricks I discovered along the way (my notes are in italics):

Ingredients:
  • Double Boiler, or 2 nested pots on a portable electric burner
  • Metal mixing bowl and wooden spoon
  • Rabbit Skin Glue (dry crystals)
  • Sinopia brand Titanium White pigment
  • Small power sander
  • Bag of marble dust. 
  • ArtBoard brand panels
  • housepainting brush
  • large tupperware container with lid

I bought everything at a hardware store and art supply store; the pots and bowls I stole from my own kitchen - not to be used for food again.


Preparing Glue Size (Rabbit Skin Glue) DAY ONE AND TWO
  • Soak one measure (by volume) of glue to 12 measures of cold water
  • I used 1/4 cup RSG to 3 cups water in a big tupperware container I do not plan to use for food again
  • Allow glue to soak preferably overnight
  • The next day it is a gelatenous substance.
  • Heat glue mixture in a double boiler bath - I don't have a double boiler, so I just nested two pots together which worked fine: I boiled a half-pot of water on a portable electric burner in my studio, and nested a smaller pot inside. The smaller pot is non-stick. The glue melts and becomes liquid very easily.
  • Apply glue while warm with a flat brush - I used a housepainting brush, but a softer art brush is probably better.
  • Be warned: this is makes sticky mess, since you need to cover the panel on all sides and there is nowhere to hold onto it. I discovered this method works best:
  • Hold the panel from underneath on your fingertips, like a waiter holding a tray, and then brush the glue onto the (top) painting surface and edges.
  • Lean the panel against a wall, so just the top edge or corner is touching, and them gently brush glue on the back side. (I scored and folded foamcore to protect my wall and floor)
  • Usually two layers are enough to seal the wood effectively. It dries fast, in about an hour or less I could do the second coat. Then I let the panels dry overnight.
  • At this point it is advisable to adhere a piece of fabric (thin muslin sheeting) to the panel to help stabilize the ground and to protect it from joints in the panel that might show in the gesso. (I did not do this - I like my painting surface to be very smooth and I didn't want the cloth texture.)
  • The left over glue-size then gets used for the chalk ground.
  • NOTE: The RSG turns to jelly again if you let it cool, it firms up quite a bit of you leave it to cool overnight, but you can re-heat the next day, it works fine.

Chalk Grounds: Ingredients DAY THREE, FOUR, FIVE....

3 parts of glue size (by volume) (I made extra RSG and used 3 cups)
1 part chalk (I used 1 cup)
1 part pigment (white, english red, umber, etc.)
I found it needs more pigment, otherwise the gesso is too watery and transparent. I ended up using more than 1.5 parts.
I used Titanium because I did not want to deal with the health hazards of sanding the lead-based "Flake" white

Chalk Grounds: Directions
  • Measure out the glue size solution into a metal container (I did not understand this at first - but it is to help measure correctly, since it is hard to know how much is left over in the double boiler once you have used it to coat the panels. I used a large metal mixing bowl.)
  • Add the dry ingredients
  • Stir well but do not whisk to prevent air-bubbles (I used a wooden spoon, worked great)
  • Place container in a double-boiler bath (see my nested pot solution above)
  • Apply warm mixture with a broad brush (I found it's better if the gesso is only slightly warms - when the water in the bottom pot is not full boiling, just simmering. The gesso is a bit thicker and covers more when it is only slightly warm, not hot.)
  • Allow layer to dry to the touch and recoat. (I found it did not dry fast enough to re-coat within a few hours. I ended up letting it dry overnight between each layer. I also sanded between before each subsequent coat with a small handheld power sander I bought for less than $40 - so worth it!!)
  • Note: When applying layers of ground, brushstrokes should be applied in one direction for every coat. Reapply subsequent layers in a perpendicular direction to the previous application. Yes this is true - otherwise deep grooves can develop which are hard to sand away.
  • I ended up doing 3 coats of gesso on most panels, and 4 on a few of them. It ended up being a week-long project, spending about an hour per day.
  • The gesso cools in the pot and gets quite firm overnight. I just left it in the double-boiler and re-heated the next day, it turned back into brushable paint very quickly and the texture was fine. Sometimes I added more pigment or RSG as it warmed, depending on whether it seemed too thick or too watery.
A note about my sander: I used a handheld Black and Decker sander, bought for less than $40. It had a micro-filter feature for reducing dust which worked quite well. I'm not a power-tool kind of person, but it was amazingly easy to use. Highly recommend!

Hope you find this useful! I know I'll be referring to these notes when I prep my next batch of panels, hopefully not for a good long time :)

Tuesday, March 16, 2010

Ecorche: Ribs

After refining the basic "flattened egg" shape of the ribcage, I was finally able to etch the ribs and carve them out a bit. The hardest part was getting the distribution and spacing correct: 10 attached ribs, 2 floating ribs, each spaced equally apart! A hint: The 8th rib at the back lines up with the 5th rib at the front.

The skull has been refined a bit - I look forward to "nerding out" on the details!

More info about my ecorche/anatomy class with Andrew Ameral:

Friday, March 12, 2010

Ecorche: Spine and 2 more Skulls

Skull Proportion Studies
8 1/2 x 11 inches, graphite on mylar

I drew these skulls from life but first I constructed them based on rules of proportion. Now I have a bunch of questions for my anatomy teacher Andy (www.andrewameralart.com), because they still don't look quite right. I think in the upper left study I somehow inadvertently moved the top of the zygomatic arch up too high. And the lower one has some unidentifiable problems!

It's strange working with skulls... playing with proportions, both the drawings and the clay model of the skull just look warped and non-human, but as I adjust them they suddenly they start to approach a look I call "skullish", meaning suddenly they start to look like skulls.

I think we all have a template for what a skull looks like. I have noticed that at a certain point, the skull "locks in" (or at least gets closer) to the idea of a skull.

Spine Studies
8 1/2 x 11 inches, graphite on mylar

These spine studies are after Richer. His anatomy diagrams at first looked cold and a bit boring to me, but the more I copy them, the more I am impressed by the enormous amount of very precise information he packs in: gracefully at that, and with highly economical linework.

I spent a couple hours just blocking in these spines, but I got overwhelmed to think of drawing every little spinous process. I think I'll just draw ONE vertebrae from several angles!

Thursday, March 11, 2010

Ecorche Drawings: Pelvis, Shoulder Girdle, Skull/Rib/Pel combo

Two views of the Pelvis
graphite on mylar, 8 1/2 x 11 inches

More studies for my Ecorche Anatomy class with Andrew Ameral. Two solid studio days of just drawing bones, what fun!

Side view of the Pelvis
graphite on mylar, 8 1/2 x 11 inches

I'm also continuing to refine my clay figure, but it's coming along very slowly! I have massed in my ribcage, pelvis and spine, but I won't bother to post photos till they are more developed. Will hopefully post some photos of a prettier skull this weekend.

Shoulder girdle studies
graphite on mylar, 8 1/2 x 11 inches


Studies of Skull, Ribcage, Pelvis relationships
graphite on mylar, 8 1/2 x 11 inches

Most these drawings are copies from anatomy books (sometimes composites from several), only the pelvis drawings are from life.

Sunday, March 07, 2010

M Gallery Show Opening

I just got home from Florida, where I attended my show opening Friday night at M Gallery in Sarasota. This is me and Nowell outside the gallery on opening night.

These are my 6 paintings hung for the show, all together representing nine months of full-time painting. It was a treat for me to see them framed and hung as a group.

For more information about the collection visit my page on the M Gallery website.

The evening was truly enjoyable and the turnout was high for this sunny First Friday (after several unusually rainy months in Florida). The gallery estimated they had 500-600 visitors!

UPDATE: My fellow exhibitor Michael Lynn Adams has written up a nice post about our opening on his blog, click here to visit it.

I'll be back in Sarasota to teach my Still Life Painting workshop March 22-26. The workshop is filling up but there are still a few spaces available! For more information about the workshop please visit my Teaching Page.

Wednesday, March 03, 2010

Study of Ward

Study of Ward
16 x 20 inches, graphite pencil on paper

This is the demonstration drawing I did during my most recent "6 Sundays" figure drawing class with 6 private students at my studio. The "moon" in the upper right corner is the remnants of my lecture on how light and shadow behave on a sphere.

We all had a wonderful time studying the figure in a long, multi-week pose under cool north light.

I am offering my next Classical Long Pose Figure Drawing class at my studio in San Francisco beginning May 16th, 2010. Please visit my Classes and Workshops page for more information.

I am also planning to set up a long pose model share, full time for 2 weeks, probably in July. If you would be interested please email me to let me know: sadiej@gmail.com. This will be an uninstructed workshop, limited to a small group, with the option to draw or paint. More information coming soon!

Also, I leave tomorrow to fly to Florida for my opening at M Gallery in Sarasota, where I will be showing 6 paintings.

Friday, February 26, 2010

Ecorche - Pelvis Drawings

Posterior and Anterior views of the pelvis, graphite on mylar, 8.5x11 inches, done for Andrew Ameral's Ecorche class

I have to do 5 by tomorrow, I'm still working on the other 3.... this Friday night will be spend at the studio!

The real human pelvis I bought at the Bone Room is great to have, much easier to see the forms than when looking at the anatomy books. But it's a bit tilted/twisted (the poor old lady must have had a hard time walking at the end of her life!) so I draw from a combination of the books and the real specimen.

My studio setup at the moment:

Ecorche: Skull

Continuing on with Andrew Ameral's Ecorche class I'm taking through June.

Andy showed me where my proportions were off in my previous version, and after fixing it up, the skull is looking a bit more skull-ish. This version has not had Andy's critique yet, I'm sure there are still lots of things to fix.

Thursday, February 18, 2010

Ecorche - Skull and ribcage drawings

Here are this week's anatomy drawings to prepare for my ecorche class on Saturday.

All of these are on 8.5 x 11 inch, graphite pencil on mylar. Oh, since I was asked in an email, this is the mylar I use. Be careful and read the label before you buy it at the store, though - it's really easy to buy the wrong stuff, the clear acetate pad looks almost exactly the same. (And it does not come in 8.5x11, Andy requested we do our assignments in this format so I cut down sheets from a larger pad).

Figuring out how to do the correct spacing on the ribs was the challenge. I did not realize how hard it was going to be. I can;t imagine sculpting this.... I guess I'm about to find out!

I really like the stage of drawing where I get to play around with tiny subforms and see all the crazy shapes nature can perform. But with the ribcage, it was all just blocking-in and measuring, no time to explore the fun details of the morphology.

I have a feeling there will be more ribcage drawings assigned next week though, so maybe I'll get my chance.

Sooo tired, but having a lot of fun!


Wednesday, February 17, 2010

Ecorche - The skull is refined a bit

Today I worked on my ecorche skull for about 4 more hours and did not get close to finished.... I never knew I could spend so much time on 3 inches of clay! I think I over-emphasized the "worried" look.

As difficult as it is getting all the proportions and forms correct... then it has to be symmetrical.

Andy has shown us key landmarks for keeping the whole thing in proportion, but while I whittle away at the details with tiny dental tools I back up and realize the main proportions have been distorted - then it's back to hacking away with the bigger tools.

Anyway, it was a lot of fun, and I started to get a feel for how the clay works and what the different tools do. I began to get a real appreciation for plastelene (non-hardening) clay. It's amazingly structural, takes deep carving easily but also holds up when you want to just take a tiny shaving off.

Neat-o stuff!

Above is my current setup in my studio for the anatomy drawing homework. I open every anatomy book I have and pick the best images and prop open the pages for easy reference while I am working.

This week I'm drawing the ribcage. I didn't realize how difficult it would be, it's not the sheer number of ribs that's the hard part, it's getting the correct angles, width and spacing.

I have more appreciation every day for the efficiency and complexity of organic engineering: Twelve ribs and not one is parallel to another, yet together they form the most perfect, graceful cage.

If you bend your fingers slightly, with a bit of space between them, into a soft, almost-fist, you'll see at no point are any of them parallel... the ribs are the same way, every facet converging or splayed, but all together they look evenly spaced.

It's a feat of engineering!

Saturday, February 13, 2010

Ecorche - Skull

I started sculpting the tiny skull today in my ecorche class with Andrew Ameral, beginning with building a proportional shape showing the major planes, then roughing in the features.

Friday, February 12, 2010

Écorché - Skull drawings


Last week was the first day of my ecorche class with Andrew Ameral.

Ecorche is studying anatomy by sculpting a "flayed" figure - as if it has no skin, so you can see the bones and muscles. We sculpt the bones first and then build all the muscles over the skeleton.


Every week we will have drawing homework. This week we were assigned to draw a skull from 5 different views. It took me exactly 10 hours to draw these 5 skulls - very, very difficult to get the proportions correct.

These two sheets of drawings are each are 8x10 inches, drawn with graphite on mylar paper. Mylar is a translucent vellum that is my new favorite paper for pencil drawing. It grabs the graphite with a silky/dusty feeling and is capable of getting a huge range of value from graphite. These drawings were all done with 2H (very hard) pencils.

I also need to label these with all the names of the bones of the skull - did you know the skull is made up of 22 different bones?

I bought my skulls at The Bone Room. The store is near me in Berkeley, CA, but you can also buy from them online. The cast skulls with the brand name "Bone Clone" are amazingly high quality for a very reasonable price!! I bought the two skulls (one real, one cast), a whole pelvis, and also a fibula (which nicely illustrates the tapered, spiraling nature of organic form!). I contemplated lots of other things to buy, but had to hold off for now. Next I am going to save up for a whole skeleton....

Andrew's class runs through June, and I'll be blogging it as much as possible, so stay tuned!

American Art Collector Feature

I'm thrilled to be included in the March 2010 issue of American Art Collector Magazine, to hit the stands in about 10 days (the PDF for subscribers is available now).

The article promotes my March show with Michael Lynn Adams at M Gallery in Florida. I will be showing several of my Wax Paper series, as well as the new Conch Shell and Pewter Pitcher paintings.

Wednesday, February 10, 2010

Conch Shell - FINISHED!

oil on panel, 9 x 12 inches
See previous post about this painting


(detail)

Over the last month blogging has taken a backseat to finishing the final paintings for my upcoming show at M Gallery in Florida, also setting up my new studio, starting private classes and workshops at the new studio, and teaching MFA candidates one day a week at the Academy of Fine Art.

Phew!

Oh, and I also started an amazing, inspiring ecorche class (sculpting all the bones and muscles of the human body in clay) with Andrew Ameral, master anatomy teacher from the Florence Academy.

So yes, I have been very busy, but really never happier!!

Pewter Pitcher

oil on panel, 8 x 8 inches

My favorite little pitcher, it was such a joy to do a study devoted to it alone! So many lovely oranges and lavenders peeking through its patina....

This painting and 5 others will be at my show at M Gallery in Sarasota, Florida for the month of March, opening March 5.

Be sure to check out the workshop I am offering in Sarasota to coincide with the show, and my other upcoming classes and workshops!


Tuesday, January 12, 2010

First drawing class in the new studio

I just held my first class in my new studio, a weekend figure drawing workshop. The class was a wonderful group, and we all had so much fun!

There is still space for ONE more student in my 5-week figure drawing class beginning this Sunday, an opportunity to study a long pose in my new north-light studio.

Also, I just posted registration information for my upcoming classes: "Still Life Painting" and "Drawing for Absolute Beginners".

More information at:
www.sadievaleri.com/teaching.html

Wednesday, December 23, 2009

Conch Shell

I grew up visiting Cape Cod in Massachusetts, wandering the beaches with my back tanned dark from all my hours hunting seashells. So I was delighted when I saw this familiar shape sitting on the windowsill at the home of my friend Lisa. She told me a friend of hers found it intact on a Cape Cod beach, which I happen to know is a real find because they are usually broken. Lisa agreed to let me borrow it, and now that the new studio is set up I am finally able to begin studying the shell.

Drawing a seashell is like solving a puzzle - every piece fits logically with every other piece, there can be only one way it all fits together, and it is completely wrong until it is completely right. The same way some people enjoy doing crossword puzzles, I'm going to enjoy my next few hours at the easel finding how all those pieces fit together.

Tuesday, December 22, 2009

Studio Photos


The new studio is finally all set up! Thanks to everyone who made it to my studio warming party, if you missed it and you'd like a tour, just email me to arrange a visit.

I have been designing this studio in my mind for years, it's wonderful to get the chance to create the ideal environment for my work and for teaching students.

If you are interested in studying painting or drawing with me, please visit my Teaching Page to see the schedule for classes beginning in January. Also, sign up for my mailing list to be notified when new classes are posted.

Wednesday, December 09, 2009

Sterling Boat: FINAL

Sterling Boat
oil on panel, 9 x 12 inches

Finally finished! It ended up taking about 16 sessions over the course of a month, for a total of 68 hours, including the initial contour drawing. Thanks to everyone who has followed along the last few weeks as I posted all the stages of this painting, it been an interesting experiment to document the process so closely.

Here's a slideshow of all the stages of this painting:


Click slideshow to see it larger in Picasa

This painting will be in my March show at M Gallery in Sarasota, Florida. The show will coincide with my painting workshop, March 22-26, also hosted by M Gallery.

I've just added Still Life Painting classes to my San Francisco teaching schedule. I'm thinking about offering a drawing course for absolute beginners later in 2010, if this is something you'd be interested in please email me.

Finally, my new studio is coming together and I'm looking forward to posting photos soon, stay tuned!

Sign up for my mailing list to be notified when I post photos of the new studio, new artwork, and upcoming art classes.

Thursday, December 03, 2009

Perez Fine Art Gallery Online Exhibition

My painting Wrapped Silver Goblet is now showing in an online exhibit at Perez Gallery for the month of December. It's beautuful collection of work and I'm proud to be shown in this group!

Click here to see the Perez Gallery Winter Exhibit

You can even vote for your favorite painting ;)

Wednesday, December 02, 2009

Sterling Boat: Session 12

Sterling Boat - DETAIL - work in progress
oil on panel

Sterling Boat - PREVIOUS DETAIL

Tiny, tiny differences between the two, I just made this section more crisp, maybe you can tell if you compare the two shots closely. I won't even say how many hours I spent today on this one segment of wax paper, except to say it was my longest single session on this painting so far.

Wax paper in the light - the whitest, brightest parts, is always the hardest this for me to paint. I think it's because white oil paint has a different texture than the transparent paints in the shadows. White pigment is thicker and more grainy, so it looks like crusty paint even when other parts melt into a convincing illusion. And I'm always wishing it could be brighter to match the dazzling highlights I see. I always despair over these bright white sections in all my wax paper paintings.

In contrast, the strip of painted wood shelf is super easy, it flows out in a flash - I can spend hours to create the illusion of a square inch of wax paper, and only minutes for a square inch of painted wood.

What I like best about this section is the filtered cool light that shines through the paper and onto the edge of the shelf, illuminating it with a little pale glow within the cast shadow.

I listened to an audio book while I worked today, I usually listen to NPR podcasts - Fresh Air etc. But something about listening to one long narrative all day really enhanced my focus and I barely stopped painting for even a minute all day. It was great! I think I'll keep doing that. Maybe the podcasts changing subject so often is messing with my concentration.

Sometimes I listen to music while I paint, but usually the verbal narrative in my own head starts to get distracting. I have a bad habit of ruminating on unpleasant thoughts while I paint, so I need something innocuous to occupy my verbal brain while I work.

Are all artists like this? Can you work with focus for hours in silence, or with music? Can the music have lyrics or do you need it to be instrumental?

Making art while surrounded by chatter reminds me of art class as a young kid. Art class in elementary school was the one class where the teachers usually let kids talk while working, and I would always work silently but enjoy the chatter of schoolkid gossip all around me.

Tuesday, December 01, 2009

New Studio Preview

My husband Nowell took this photo of me in front of my new studio building this evening. And here's a sneak preview of the inside by day...

It's pretty bare now but at least you can see the cool double doors and beautiful north light! I'm dying to show you more but I'm going to wait till it's all set up.

Sterling Boat: Session 11

Sterling Boat - DETAIL - work in progress
oil on panel


Sterling Boat - PREVIOUS DETAIL

I spent most the 4-hour session today on the seashell, but I think you can see the most difference in the before/after shots if you look at the edge of the painted wooden shelf.

The seashell is challenging because it is reflective, translucent, AND colorful. I'm trying to show a shiny surface that also has depth, because the light both bounces off and penetrates the surface. So there's a lot of fiddling, pushing the values and hues around bit by bit. Slow, slow painting.

This is where glazing makes a big difference because I can layer transparent films of color into a couch of slow-drying oil medium, and make tiny adjustments.

Also, thinning the paint with oil makes a cleaner edge, because the texture and goopiness of the paint is reduced. Just like how melted butter can spread in a thinner layer than cold butter simply spread thin.


------UPCOMING CLASSES AND WORKSHOPS-----------
I teach Classical Realism drawing and painting classes and workshops in my north light San Francisco studio. I also offer workshops at other locations in the US. Please visit my Teaching page for more information and to register!