Showing posts with label drawing. Show all posts

Wednesday, December 23, 2009

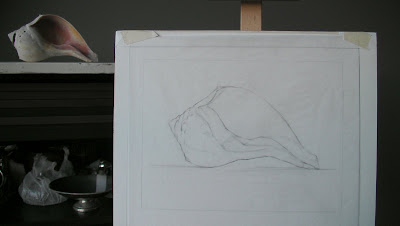
Conch Shell

I grew up visiting Cape Cod in Massachusetts, wandering the beaches with my back tanned dark from all my hours hunting seashells. So I was delighted when I saw this familiar shape sitting on the windowsill at the home of my friend Lisa. She told me a friend of hers found it intact on a Cape Cod beach, which I happen to know is a real find because they are usually broken. Lisa agreed to let me borrow it, and now that the new studio is set up I am finally able to begin studying the shell.

Drawing a seashell is like solving a puzzle - every piece fits logically with every other piece, there can be only one way it all fits together, and it is completely wrong until it is completely right. The same way some people enjoy doing crossword puzzles, I'm going to enjoy my next few hours at the easel finding how all those pieces fit together.

Monday, October 26, 2009

Winged Victory Drawing Demo


See the larger version here

I made this 8 minute movie of my 10-hour drawing of my cast statue "Victoire de Samothrace" to demonstrate the optical block-in method.

1. The line drawing is all straight lines.
2. The shadow side is first filled in as all one even tone.

These two methods are difficult to adhere too, but if you can do it they address the main difficulties in drawing: capturing accurate proportion, and understanding light and shadow.

Materials:
  • Strathmore 400 drawing paper (not ideal for charcoal)
  • vine charcoal, hard medium, and some soft (sharpened very sharp with sandpaper)
  • kneaded eraser
  • white "magic rub" eraser
  • paper blending stump
  • rough, cheap paper towel for blending


Winged Victory
charcoal on paper
18 x 24 inches

Friday, September 25, 2009

Wrapped Silver Goblet: Video 1

My new painting Wrapped Silver Goblet is almost done (see the first post about this painting here). I've been filming the process of creating this painting, so here is my first episode: A demonstration of how I developed the preparatory contour drawing in pencil:


(Click here to see a higher quality version)

In the video I mention transferring a drawing to a panel using trace paper. A lot of people ask how this is done so here is a how-to I wrote up for a student recently:
  1. Draw a straight-line block-in of your composition with pencil on white drawing paper. Make your drawing the same size and shape as your painting panel.
  2. When your block-in drawing is done, lay it down on a table (not an easel) and overlay a sheet of tracing paper. Tape down all 4 corners with removable artist's tape.
  3. Trace your drawing onto the tracing paper with a hard pencil (H or HB). Be sure to trace the corners of the drawing too, so you can line it up correctly on your panel.
  4. Remove the tape, flip over your trace paper drawing and scribble gently with a soft pencil (2B/3B) over all the lines you can see through the trace (OR you can use transfer paper, which you can buy in rolls at the art supply store).
  5. Arrange the trace paper drawing-side up (scribble side down) over your panel. Line up corners with the drawing. Tape all the corners.
  6. Using a hard pencil (2H) go over all lines of the drawing to press the contour lines onto the panel. Occasionally lift one corner to make sure the lines are transferring.
  7. When you have traced all your lines, discard the trace paper. Your drawing should be transferred to the panel. Move the panel back to the easel
  8. Refine your drawing on the panel with a 2B pencil, working from life. (Otherwise all your lines will have the dead, "traced" quality")
  9. Varnish the panel to seal the surface. Optional technique is to trace over all your pencil lines with a sepia-ink fountain pen or brown ultra-fine sharpie. Either way, seal the surface of the panel with varnish. Allow to dry. (I use damar varnish thinned with Turpenoid and with a small amount of Titanium white mixed in. Shake it in a jar to mix.)

Friday, August 14, 2009

Blocking In (new wax paper series)

Wrapped Silver Goblet (in progress)
11 x 14 inches
graphite pencil on trace paper

I have a couple teaching opportunities coming up which I am very excited about: I'll be teaching drawing this fall semester to first-year MFA grad students at San Francisco's Academy of Art University, and there are plans in the works to possibly do a couple workshops next year (I'll keep you posted).

All of these opportunities are really exciting, and as I have been thinking about them I find I am "teaching" myself as I work all the time. Observing myself as I work helps me avoid problems deeper in the drawing. It's a sort of narration: At first it was non-verbal narration, simply paying attention to what I see and and comparing that to my drawing. But since I have begun teaching, that internal narration is becoming more and more verbal, as I imagine how I would teach as I draw.

I've been working the last couple days to begin a few new paintings of still life, and my first step is using straight-line block-in to establish the composition and forms.

Wrapped Bottle (in progress)
graphite pencil on trace paper
6 x 8 inches

Block-in for me is always the most stressful stage of a painting or drawing. Positioning the correct placement and shape on that blank space feels like plotting a course across the Atlantic.

I put the first few lines down and for a short while I feel like everything is going great, and then as I move into the next level of detail the errors begin to show up. And since the initial block-in is defining the whole shape with only a few lines, the errors are usually quite drastic and devastating to the design. Panic!

Beach Stone and Wax Paper (in progress)
graphite pencil on trace paper
5 x 5 inches

I tell my students that drawing well is essentially learning to control a sense of constant panic (I say that because I think a lot of us are quietly panicking in drawing class, and it helps the students know everyone else is feeling the same way, including me.)

But I try to use that panic to my advantage. The "Oh, no, it's all wrong!" feeling can plummet any draughtsman into despair and temptation to abandon the drawing (or crumple, scribble, or burn it).... But it's also a useful feeling. If we can react to the feeling with calm and acceptance, and simply take it as a reminder to stop and look, it becomes a useful tool.

My confidence in the block-in process has grown with my experience and now I know if something is wrong, if I keep my head calm and just look, I'll probably figure out the problem.

Not that I always do a perfect block-in by any means. And I certainly do not do my best block-ins when I am demonstrating in front of a group. But like any mental/emotional discipline, the more you practice, the easier it is to tap into problem-solving mode and focus, even in stressful situations.
Saturday, August 01, 2009

Hudson Fellowship Day 26


Tree Color Study
9 x 12 inches
oil on linen panel

What a day - up and out in the field by 7:30am, quick run home for a 30 minute break at midday, then back to the field till 4:30. At 7:30 we'll go out again for a final attempt at a sunset study. We're trying to cram in one last good long workday before we leave tomorrow. Best part is it's been warm and sunny all day, and the puffy cumulus clouds rolling by all afternoon are indicating a killer sunset to come.

The painting above is my continuation of the painting I started a couple days ago. Later I moved into the shadow of the same tree to do a close-up drawing of it's awesome tangle of branches coming off the trunk (below).


Last, I did this little sketch of Emily under her white umbrella as she painted in a field of purple wildflowers under billowing cumulus clouds.


Emily en Plein Air
oil on linen
6 x 8 inches

Next up, dinner and then a final attempt at a sunset sketch. I'm really not looking forward to the sunset session as I have officially run out of bug repellent...

I probably won't have time to post again for a few days, as I plan to jump in the car early tomorrow to start my 4-hour drive to Pennsylvania where I'm meeting up with my husband before we fly together back to San Francisco in a few days. Thanks to everyone for following along, it's been a really intense month and I've appreciated all of your well-wishes.

Friday, July 31, 2009

Hudson Fellowship Day 25


Tree Branch Study
pencil on paper
approx 6 x 9 inches

We made a valiant effort to get up and out early to work by 8am while the weather was clear, but the rain came down hard by 10am and we had to scramble to the car before we floated away - all I got done was a block-in drawing of the tree I painted yesterday, not even worth posting here.

It continued to pour hard the rest of the afternoon, so a few of us set up to work on the porch of the house we are staying in. The above is my drawing of a particularly dramatic tree branch visible in the yard. It's such a great specimen of organic form, I don't know why I ever needed to venture off the porch at all!

Here are Fellows Ken Salaz and Emilie Lee working with me on the porch to avoid the rain:


Tomorrow is supposed to be sunny and warm, our last full work day, so many of us are hoping to get in a final session of working from our primary subjects.

Wednesday, July 15, 2009

Hudson Fellowship Day 9

"Ship Boulder"
graphite pencil on toned paper

Tuesday, July 14, 2009

Hudson Fellowship Day 8

I'm trying to pick a composition and commit to one scene (or maybe 2) so I can focus my studies towards making a fully developed painting. Having a hard time choosing though, everywhere I look there's something to potentially paint.

This was my atempt today but I don't think I'm going to pursue it. It's too complicated to understand what's going on.

The fatigue is starting to get to me. Not getting enough sleep, plus hiking/scrambling around in the gorge, plus sitting and working for hours in the cold, are all starting to wear me out! Going to try for 9 hours of sleep tonight... my goal is try to sleep at least as many hours of the day as I paint!

Check out the Grand Central Academy Blog which is documenting more sketches from the Fellows, so you can get a closer look at what's on that long table.

Monday, July 13, 2009

Hudson Fellowship Day 7

Trees with view of Hudson Valley
ink and white guache on paper

cloud studies, pencil on paper


Sunday, July 12, 2009

Hudson Fellowship Day 6

Where I worked from 9am to 6pm today

"Two trees with exposed roots"
approx 9 x 12 inches
ink and white guache on toned paper

"Waterfall and pool"
approx 7 x 12 inches
ink and white guache on toned paper

Day 4 boulder sketch, more details added

Saturday, July 11, 2009

Hudson Fellowship Day 5

falls study
ink and guache on toned paper
approx 9 x 12

A closeup-of the upper region of the composition I sketched yesterday.

Friday, July 10, 2009

Hudson Fellowship Day 4


Composition study/equisse
India ink and white guache on toned paper
approx 8 x 10 inches

I worked with pen and ink today for the first time and loved it! A diluted ink wash creates controlled values much faster than graphite pencil. I started with a rough graphite-pencil block-in, and then refined the contour drawing with a dip-pen and ink. Then I diluted the ink with water (on a plastic palette) and used a brush to lay in the washes, building up the layers slowly to reach the values I wanted.

Study/etude of boulders and falls
India ink and white guache on toned paper
approx 6 x 10 inches

Every couple of days we all meet as a group and show our sketches on a long table. The work as whole is stunning... absolutely everyone here can draw incredibly well and it's both inspiring and daunting to see the row of studies. The instructors Edward Minoff and Travis Schlaht give anyone who asks a detailed critique about how to focus our drawings to be useful studies for a painting we'll do later at our studios. Jacob Collins apparently arrives tomorrow...

To see a nice quick overview of the work from previous years go to this page of past Fellows and mouse over each name to see an example of their work.

As for painting... yes, I am itching to begin painting in color! But on the other hand, doing these drawings has only emphasized how complicated nature can be, and I know I'll be grateful for having done all the line drawings and value studies when I start grappling with color.

Thursday, July 09, 2009

Hudson Fellowship Day 3

Lower Kaaterskill Falls "equisse" sketch
approx 9 x 12 inches
graphite pencil and white charcoal pencil on paper

I spent another day at Kaaterskill Falls. I like the boulders, the trees with exposed roots, and also the small waterfalls, so I found a composition with all three. In the above sketch I was just trying a compositional block-in. I tried to limit myself to 3 simple values, to help me break down the scene.

Water study, approx 9 x 12 inches

Earlier in the day I did the above sketch, trying to understand how a waterfall behaves.


Thumbnail/croquise
approx 4 x 5 inches

This was my first thumbnail sketch. It's tiny but the scene is complicated. I wanted to do a quick sketch and then move on to do about 4 or 5... but I ended up spending an hour and a half on just this one.


Wednesday, July 08, 2009

Hudson Fellowship Day II

View of Katerskill Falls with fellow sketchers at the bottom


Boulder with small waterfalls
graphite and white charcoal on toned paper
approx 9 x 12 inches

Tree roots with glimpse of waterfall
graphite and white charcoal on toned paper
approx 9 x 12 inches

I worked most the day lower down the trail, well below the falls. The river has boulders and fallen trees making miniature waterfalls all along it.

After 7 hours of drawing and light hiking I was very done for the day.... but had to wait for my more intrepid fellows to wrap it up before I could get a ride home. My fellow landscapers are a hearty bunch. Luckily a short rainfall came along and sent enough packing for me to catch a ride. (And luckily I was well prepared for rain after yesterdays' deluge.)

I definitely want to go back to the falls another day and work there again. But next time I'm taking my own transportation!

PS: The Grand Central Academy has it's own blog and they are updating the blog with posts about the Landscape Fellowship as well, lots of cool photos of our locations:

Thursday, June 04, 2009

Figure Study

figure study
graphite pencil on paper
cropped detail, 18 x 24 inch paper

This is a recent study of a 3-hour pose. This was the last session of my Tuesday figure drawing with Michael Markowitz's 23rd St Studio. The next series of classes starts up while I am away for the month of July doing landscape painting in upstate New York but I'm hoping to resume in August.

Update on the "Big Still Life" a.k.a Bottle Collection:

I got a great tip for dealing with dust that has already dried into earlier layers of my painting, and spent some time today wet-sanding the surface. It was deeply satisfying to get all the grit and imperfections out of the painting and now I have a surface like glass!

UPDATE Jun 5: I made a new post here about the wet sanding process.

Friday, April 24, 2009

Winged Victory

Winged Victory
(after a cast of the Hellenistic Greek Statue Victoire De Samothrace)
18 x 24 inches, cropped detail
white chalk and vine charcoal on blue laid Ingres paper

In 2003 I was amazed to find for sale a high quality 1/2 scale cast of the Winged Victory. She is my prized possession but somehow I rarely find time to sit and draw her. I finally got a chance and spent several days over the last couple weeks experimenting with chalk on toned paper.

I started with a pencil line drawing on white paper and transferred the major lines once I felt confident with the drawing. It was difficult to control details and values on the textured laid paper and I found it worked best to sharpen white chalk pencil and hard/medium vine charcoal to a very fine point with sandpaper.

I'll be teaching this Sunday and then Monday I'll be out of town for 10 days, so the blog will be quiet a while till I get home and get my studio work going again. I've been chipping away at the big still life, hoping to post another finished detail soon!

Thursday, April 09, 2009

Recent Figure Drawings

Shawnrey: 3 hour study
graphite pencil on buff canson paper
18 x 24 inches, detail

Claire: 3 hour study
graphite pencil on buff canson paper
18 x 24 inches, detail

I've been continuing my figure drawing studies and having a lot of fun with it. I've been drawing these last few weeks at Michael Markowitz's studio in Noe Valley. He has an amazing drawing studio in a classic San Francisco corner storefront, all set up with ropes and carpeted platforms for the model. All around the room are tiers of easels and tables for artists, with tons of lighting overhead. He auditions all his models before hiring them for a class, so far the ones I have worked with there are experienced, strong and professional. He runs several open drawing sessions a week, I believe he currently has space in Tuesday mornings and Thursday evening sessions. He posts his classes often on Craigslist>San Francisco>Artists
You can also email him for details: 23rdstreetstudio@gmail.com

Wednesday, March 18, 2009

Bottle Collection: Preliminary Drawing

18 x 24, pencil on panel

I worked a lot more on the contour drawing, as you can see I'm having a lot of fun with all these waves and flourishes of wax paper.

I thought it might be interesting to show how I am cross-referencing movement curves, or pathways. The red lines are the obvious ones, the finger-like folds fanning out from the spiral-crushed center. What is exciting is to find the secondary lines of movement, the green lines. Together they make a meshed network, and you can find them running nearly any direction.

Wherever these curves intersect there is an "event", a significant landmark.

This approach really helps me plot and organize what at first seems like an overwhelming jumble. The network of pathways continues to subdivide in deeper and deeper complexity, so the deeper into the drawing, the easier everything starts to have a logical place. It always amazes me to see that even something "random" like crumpled paper has an internal logic.

One of the most important things I have learned about drawing is to not be afraid to change what I've put down before. I think it's common to draw a nice area and then realize it's in the wrong spot, and kind of "fudge" the drawing all around to keep the "good part".

What I have come to understand (and continue to try to understand) is that the overall logic is the most important thing, there is no "good part" of a drawing if the whole is not harmonious.

Thus I am ruthless with my eraser. Inevitably as I am drawing (and I think anyone who draws will relate!) I come to a point that doesn't "fit". I thought everything was right, but I get to a more detailed area and realize it's totally the wrong size and shape to fit all the detail that belongs there.

I've given up trying to preserve anything at all. If it's wrong, it's wrong, and I think in order to learn to be a truly accomplished draughtsperson we have to be willing to scrap all the previous work in order to improve the whole drawing. I did it many times for this drawing.

There must be a determination to really understand what is happening instead of preserving the pretty bits... anything less is merely the artist's ego dragging the drawing along to congratulate itself.

A drawing should only be a record of the artist's investigation of truth, and ego only obscures truth.

There you go, another life lesson from drawing.

Tuesday, March 17, 2009

Drawing Vessels

I'm working out a composition for a new painting on trace paper, and the new setup has several bottles and vases. I thought I'd share how I draw manufactured, symmetrical objects, since they can be tricky.

The least successful approach (as I have found out the hard way) is to try to draw a curvy contour and then try to match it exactly on the other side.

Instead, I start with vertical lines marking the center line, and the edges of the widest point and the edges of the width of the neck. Then I sketch a series of diamonds to mark the outermost contours. I also draw a lot of X's to see the relationships between the neck, body and shoulders of the vessel. Finally, I draw the ovals, circles, and rectangles that make up the compound shape.

Only after that, I refine the contour. I try to be as precise as possible. Often there is a "lost edge" where the contour of the form recedes into shadow or is obscured by another shape. But I draw the entire vessel symmetrically even if part will eventually be hidden.

Finally I check it by looking at the drawing over my shoulder with a mirror. Errors of symmetry will jump out immediately when seen in reverse.

If the vessel in the final paintings is even slightly wobbly, crooked, leaning, or asymmetrical it will weaken the believability of the whole painting.

My new painting has two vases and three jars in the composition, and huge frothy waves of wax paper. It's my most ambitions still life yet, and the largest at 18 x 24 inches. I've spent several days sketching and re-sketching the composition on trace paper, and today I transferred the final drawing to the panel. I'll post some photos soon when I am a bit further along, but here's a sneak preview:

Wednesday, February 25, 2009

Fast-Pose Gesture Drawing

pencil on paper
detail about 12 x 14 inches
3 hour pose

A couple weeks ago I went to a life drawing session and was kind of horrified at how bad my short-pose gesture drawings were. I'm honestly categorically against teaching people to draw the human figure solely with fast gesture drawings, but at the same time I was mortified at how bad mine were - skritchy messes of lines that did not show at all what the model was doing.

We "warmed up" (how I loathe that word) with 1-10 minute poses, but most the session was a 3-hour pose. The drawing above is the 3-hour pose, and again I was amazed at how frantically I worked to capture the pose within the 3 hours, and felt the final drawing was not very successful.

Below was the best of the short poses from that day, a 10-minute pose. I'm not even going to post the 1-minute gestures.

10 minute gesture, pencil on paper

So after that experience I decided I needed to do some homework before the next class and so I looked at Bridgman (the god of comic book artists). I did some sketches from my Bridgman books and then moved into gesture sketches of master figure paintings.

Sketches after Bridgman
9 x 12 sketchbook page, pencil

I did this several days in a row, a couple hours a day. It was so fun I really didn't want to paint any more!

Sketches after Bridgman, Careggio, Reni
9 x 12 sketchbook page, pencil

For all of these I used a combination of Bridgman construction ideas, plus the straight-line block-in, plus the inner movement curve. Frankly the curve works best for these sketches.

Ok, I am not very fast yet - each of these individual figures on this page took 30 to 60 minutes to begin to capture the pose. But my goal is make highly accurate gesture drawings: simple, undecorated sketches that clearly show the feeling and intention of the movement.

When I went back to open life drawing session yesterday, I felt just these few hours of "homework" helped a lot! My gesture drawing improved greatly:

1 minute poses, pencil on paper

10 minute pose


3 hour pose, approx 12 x 14 inches, pencil on paper

I still struggled with capturing the poses quickly and efficiently, but I think all these drawings are better than the first day's drawings. And since I left a lot of the construction lines in you can see how I am using the "movement curve."

My original posts about Studio Escalier's inner movement curve concept are here and here.